Audiotent Tip 409. How to create a tech-house kick.
The kick drum is the backbone and workhorse of electronic music. Getting this crucial element right from the start will give you a solid foundation to build on.
In this step-by-step guide, we show you how to create a Tech-House kick using the Sonic Academy Kick 2 plugin and click samples from Audiotent - Velocity.
There are no hard and fast rules when creating kicks, but this is one of the processes we've found to work well for us. Feel free to share your processes in the comments below.
Here's a preview of the kick we're going to create:
1) First of all, load up Sonic Academy Kick 2 into its default state, this is so you have a clean slate to work with.
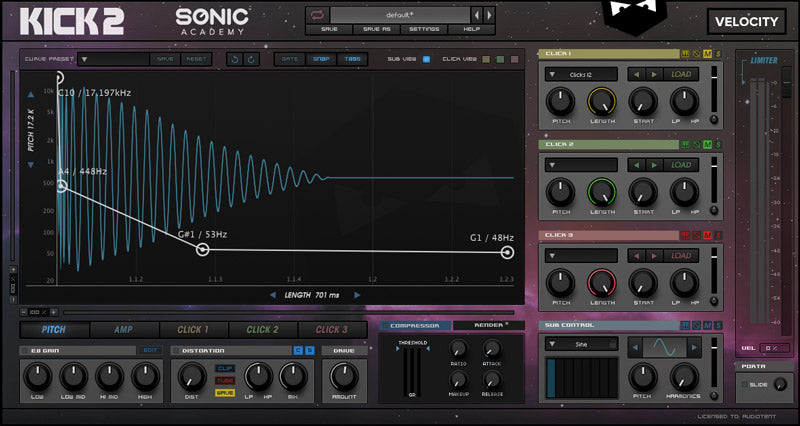
2) Next, turn off the EQ and distortion as you don't want this affecting your initial decision. Then mute the clicks, as you want to focus on the sub control first. You should have a sound like this:
3) Start by adjusting the length slider. Here you define how long the sub of your kick is going to last in ms. Set this to around 350ms which is just under a 1/8th note long. Just right for a fairly short and tight kick.
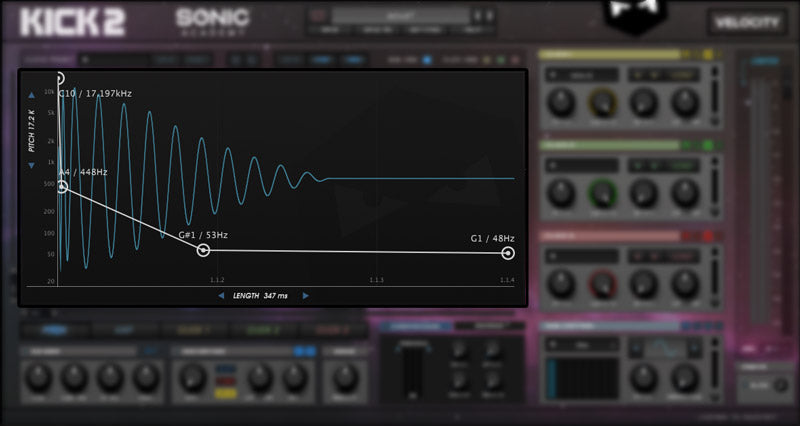
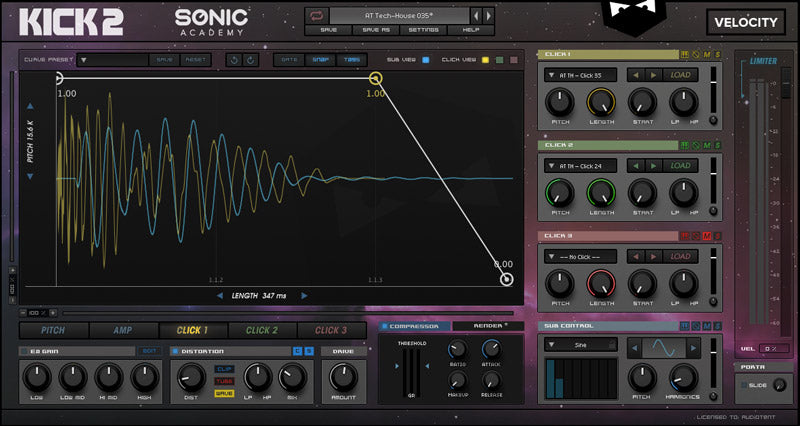
4) Next open the AMP window. Here you can shape and control your sub over time. In this example, remove some of the attack by creating two nodes towards the left side of the window and setting them to 0.00. This will allow a little room for our custom click to punch through.
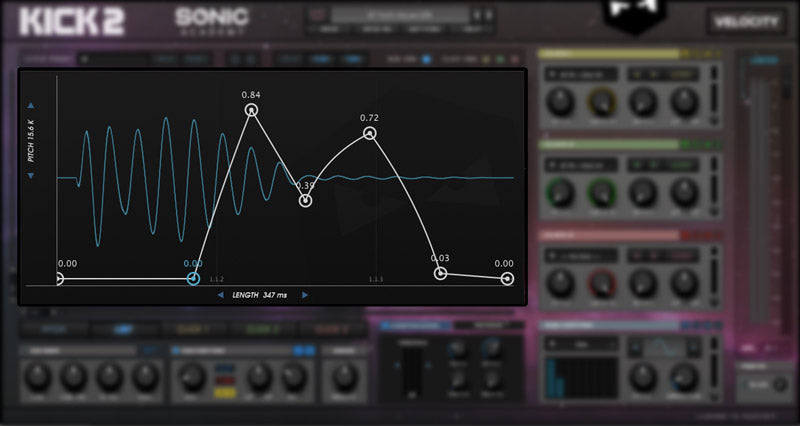
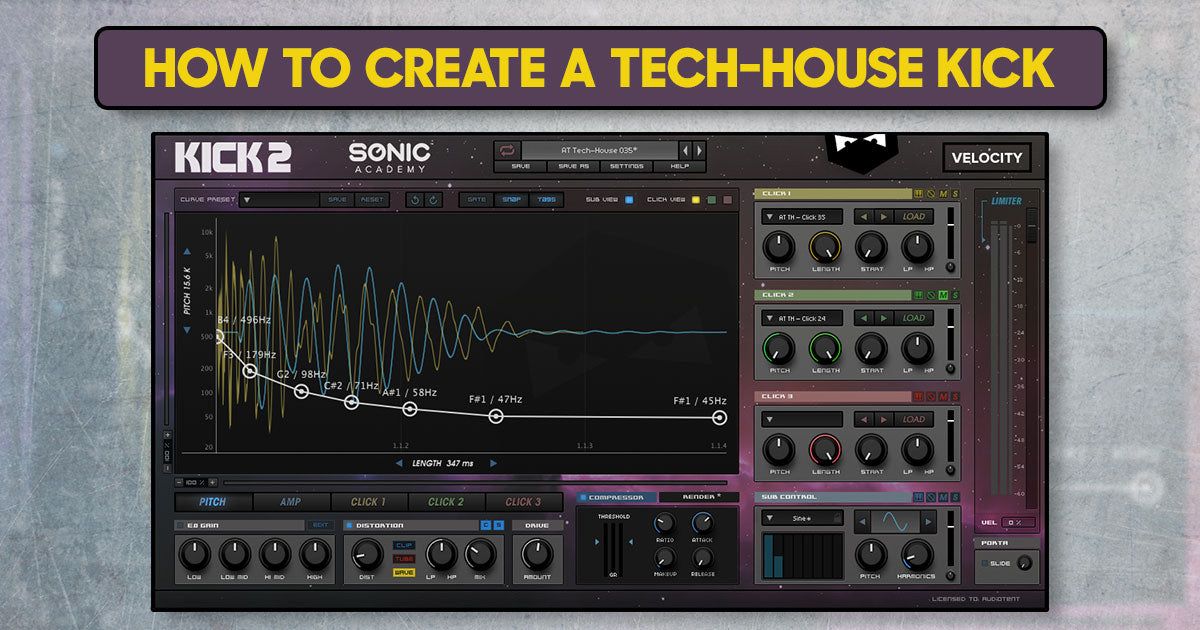
5) Next move onto the sub pitch. Here you want to create a nice descending curve that will relate to the kick pitching down over time and will denote the key of your kick. Note: Remember we explained this in our Ultimate Guide to Sonic Academy Kick 2. Generally, the key of the kick is defined by the longest (most sustained) pitch.
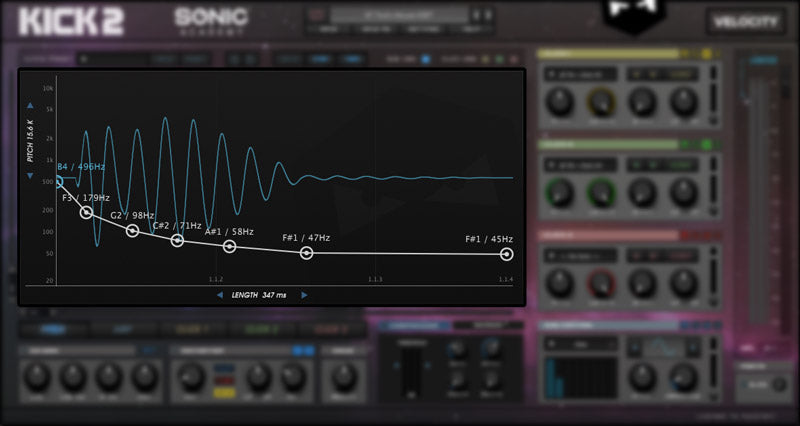
6) The sub control harmonics section is a great addition to Kick 2 and allows us to add overtones to our sine wave and can add some extra body. In this example, assign a small value to the second partial and dial in the harmonics to around 0.12. This is very subtle, but will help with filling out around the 100hz area. You should now be sounding like this:
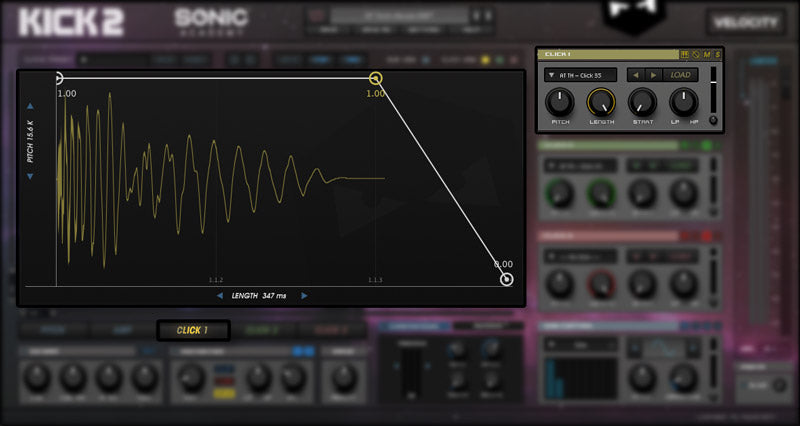
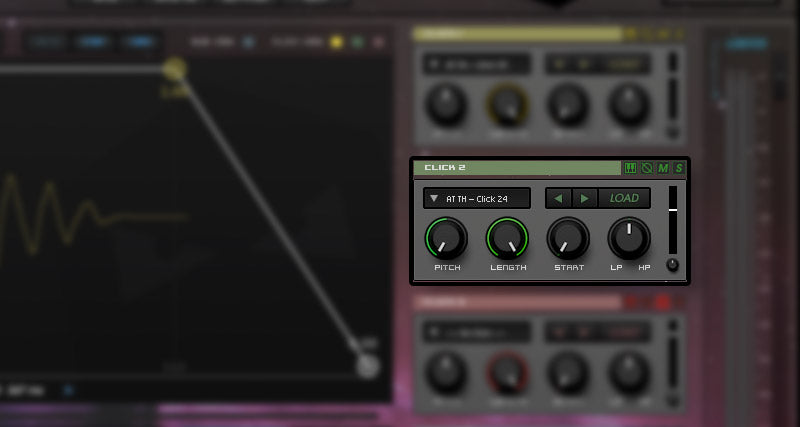
8) The kick is shaping up nice now but it could still do with a bit more crunch and dirt around the 1kHz-3kHz. Activate click 2 and this time pitch the sample down by 12 semitone to dirty it up. Then cycle through until you get one that gels with click 1 and your sub.
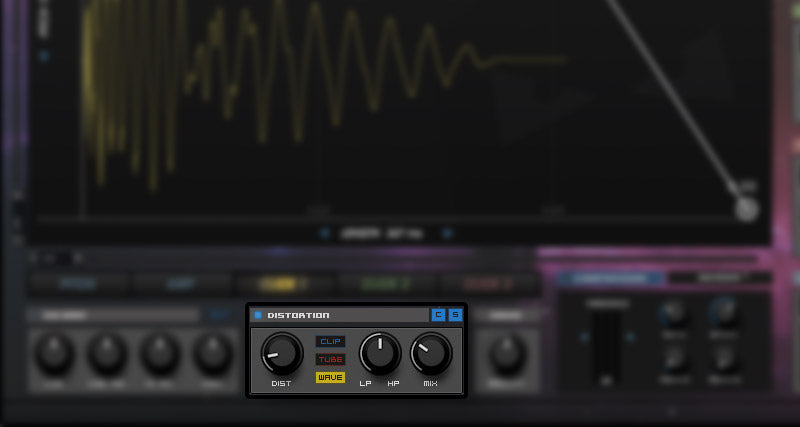
9) Onto distortion, a little can go a long way here. In this example select WAVE distortion, apply around 18% distortion and mix in around 32% of the distortion. This is very subtle but can add a nice touch of drive.
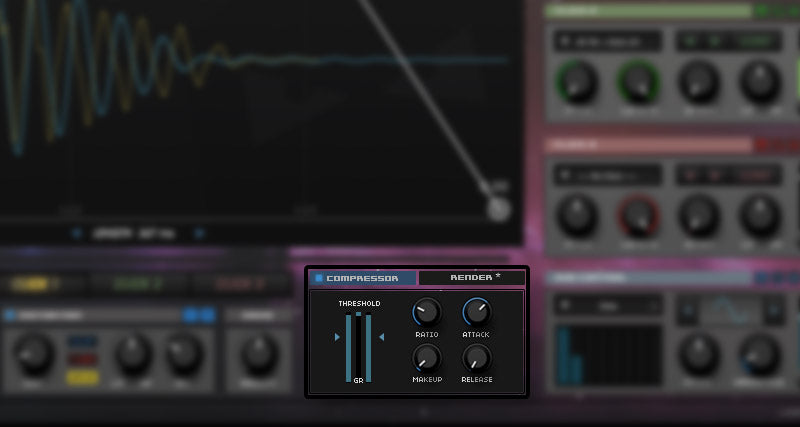
10) Your kick is nearly done! The final icing on the cake is a touch of compression and limiting to tighten it up. In the example, apply around 5:1 ratio, with a slow attack and fast release. Reduce the threshold to apply some reduction, just a touch as you don't want to completely alter the shape of the kick, it's all about small details now. Finally we will make sure the limiter is engaged that there is no more than -3db happening at the very most.
11) This is what the final kick looks and sounds like:
We hope this has been an insightful detailed look at how to create a Tech-House kick drum inside Kick 2.
If you're interested in more kicks and clicks just like this you need to listen to Velocity. It's packed full of presets, custom clicks, key-labelled wav samples and GUI skins just like the one featured in this post. Click here to listen and get your copy.

The kick drum is the backbone and workhorse of electronic music. Getting this crucial element right from the start will give you a solid foundation to build on.
In this step-by-step guide, we show you how to create a Tech-House kick using the Sonic Academy Kick 2 plugin and click samples from Audiotent - Velocity.
There are no hard and fast rules when creating kicks, but this is one of the processes we've found to work well for us. Feel free to share your processes in the comments below.
Here's a preview of the kick we're going to create:
1) First of all, load up Sonic Academy Kick 2 into its default state, this is so you have a clean slate to work with.

2) Next, turn off the EQ and distortion as you don't want this affecting your initial decision. Then mute the clicks, as you want to focus on the sub control first. You should have a sound like this:
3) Start by adjusting the length slider. Here you define how long the sub of your kick is going to last in ms. Set this to around 350ms which is just under a 1/8th note long. Just right for a fairly short and tight kick.

4) Next open the AMP window. Here you can shape and control your sub over time. In this example, remove some of the attack by creating two nodes towards the left side of the window and setting them to 0.00. This will allow a little room for our custom click to punch through.

5) Next move onto the sub pitch. Here you want to create a nice descending curve that will relate to the kick pitching down over time and will denote the key of your kick. Note: Remember we explained this in our Ultimate Guide to Sonic Academy Kick 2. Generally, the key of the kick is defined by the longest (most sustained) pitch.

6) The sub control harmonics section is a great addition to Kick 2 and allows us to add overtones to our sine wave and can add some extra body. In this example, assign a small value to the second partial and dial in the harmonics to around 0.12. This is very subtle, but will help with filling out around the 100hz area. You should now be sounding like this:

7) Ok, so now the fun part, selecting the click. Having a bank of very unique clicks is where your kick will gain most of its character. Its very much overlooked but a lot of time and processing can go into layering and creating cool sounding clicks. Stay tuned for our guide to this at a later date. In the meantime, open up the click AMP window, allow full volume of the envelope and cycle through the clicks one-by-one until you hear what you're looking for.

8) The kick is shaping up nice now but it could still do with a bit more crunch and dirt around the 1kHz-3kHz. Activate click 2 and this time pitch the sample down by 12 semitone to dirty it up. Then cycle through until you get one that gels with click 1 and your sub.

9) Onto distortion, a little can go a long way here. In this example select WAVE distortion, apply around 18% distortion and mix in around 32% of the distortion. This is very subtle but can add a nice touch of drive.

10) Your kick is nearly done! The final icing on the cake is a touch of compression and limiting to tighten it up. In the example, apply around 5:1 ratio, with a slow attack and fast release. Reduce the threshold to apply some reduction, just a touch as you don't want to completely alter the shape of the kick, it's all about small details now. Finally we will make sure the limiter is engaged that there is no more than -3db happening at the very most.

11) This is what the final kick looks and sounds like:

We hope this has been an insightful detailed look at how to create a Tech-House kick drum inside Kick 2.
If you're interested in more kicks and clicks just like this you need to listen to Velocity. It's packed full of presets, custom clicks, key-labelled wav samples and GUI skins just like the one featured in this post. Click here to listen and get your copy.


Leave a comment
This site is protected by hCaptcha and the hCaptcha Privacy Policy and Terms of Service apply.