Audiotent Tip 401. How to create a pre-shifted clap in Xfer Serum.
Have you ever wanted to create clap's purely from synthesis?
Sure, we know it's not the first thing that comes to mind when talking about synthesis, but there are many advantages in doing this.
For example, when creating a clap inside a synthesiser you have total control over how it sounds. Giving you the ability to shape the tone, length, attack and even the amount of flam.
Here's a step-by-Step guide on how to create the pre-shifted clap inside Xfer Serum:
(We've also included a video at the bottom of the post)
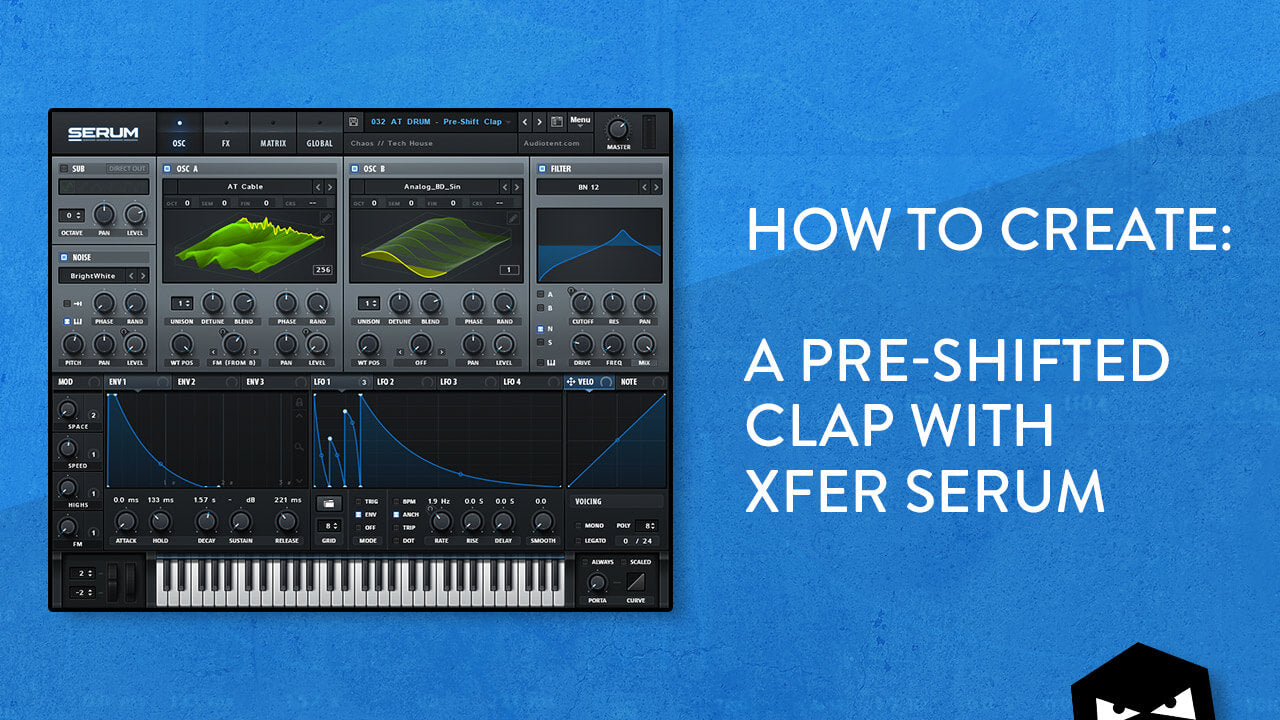
1) Initialise the preset.
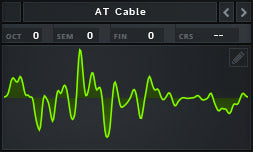
2) Next, find a wavetable that has a nice amount of harmonics. In this example, we use "AT Cable" which is from our Xfer Serum Preset pack Chaos.
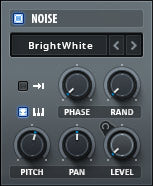
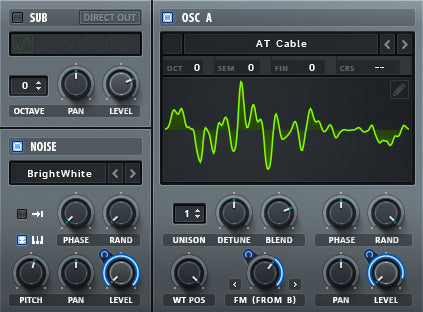
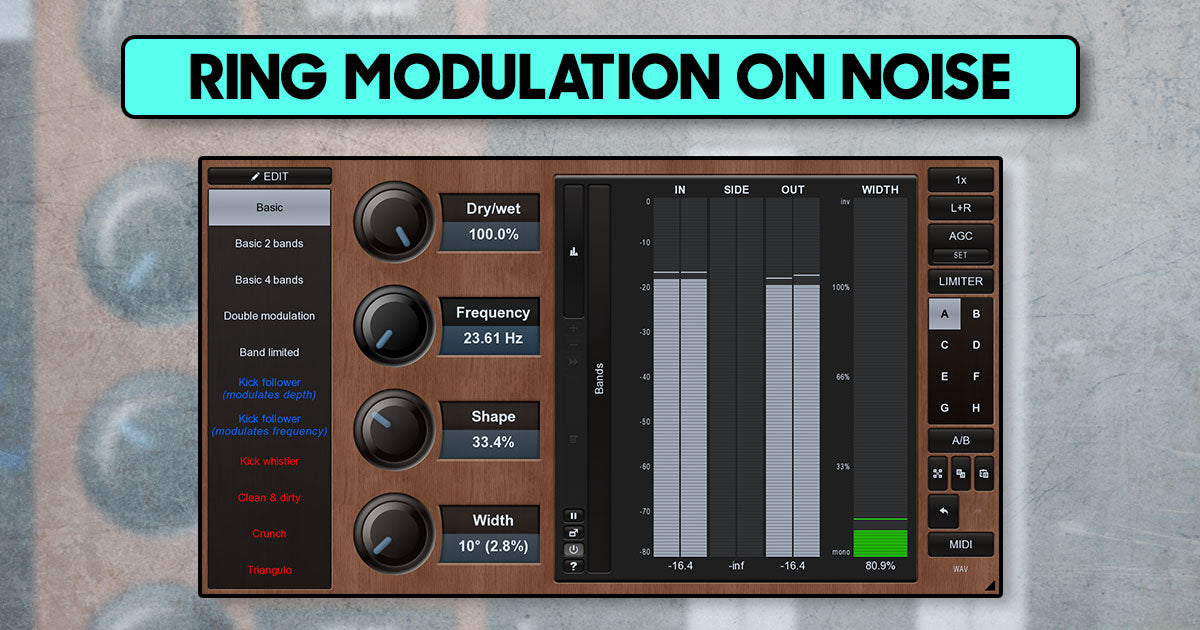
3) Switch on the noise OSC, set the pitch to around 12% and select your favourite noise. We chose "BrightWhite" for this example.
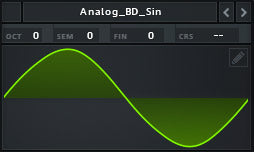
4) Switch on OSC B, select a sine wave and turn the volume all the way down. The reason we turn the volume all the way down is because we're going to use the sine wave on OSC B to modulate OSC A. We chose "Analog_BD_Sin" for this example.
The reason we chose a sine wave for the modulator is because a sine only outputs the fundamental frequency and no additional harmonics, as things can quickly become very noisy when using more complex waveforms.
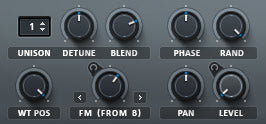
5) On OSC A select "FM from B" and turn the amount to around one o'clock.
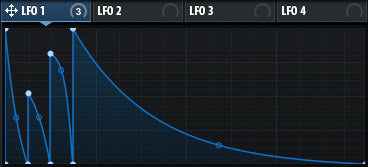
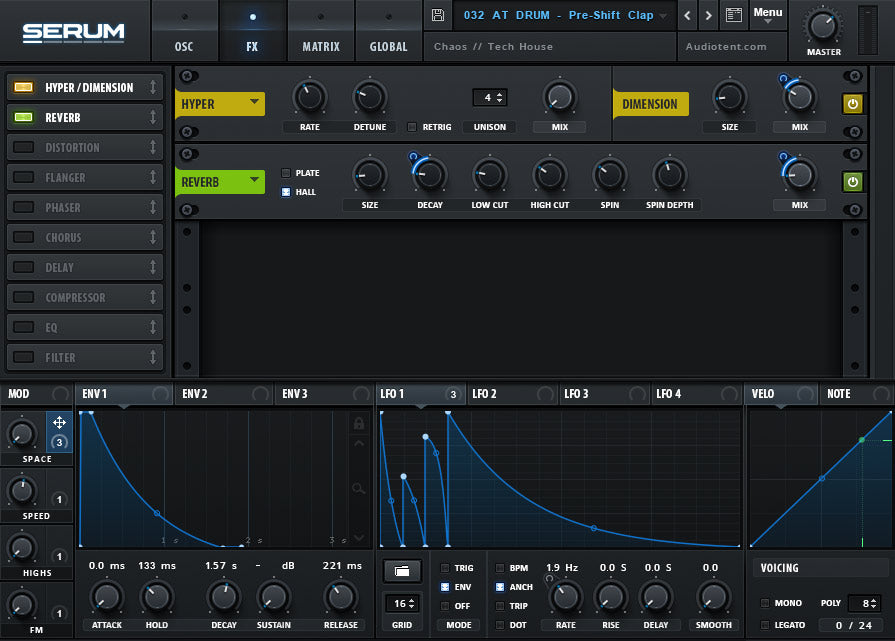
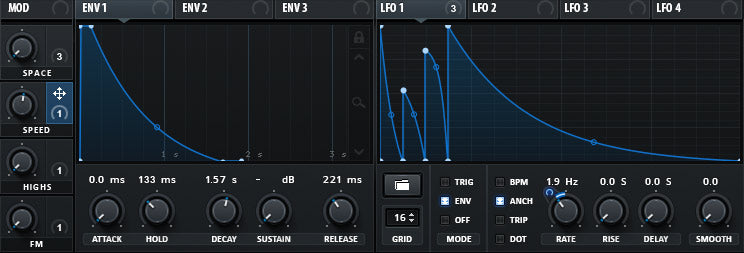
6) Next is the fun part! We're going to draw in the pre-shift for the clap. Go to LFO 1 and turn the grid size up to 16, this makes it easier for us to snap the marker points to the grid. Draw an LFO shape just like the one below. Holding ALT on your keyboard will snap the markers to the grid.
7) Now we assign LFO 1 to the following parameters. OSC A Volume, FM from B Amount, Noise OSC Volume. This is what gives us the illusion of multiple claps layered and shifted from one another.
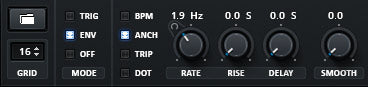
8) Next, we're going to make some adjustments to the LFO settings. Turn off BPM sync and turn down the rate to around 1.9Hz. Then set the mode to ENV as we want the LFO to reset after each hit.
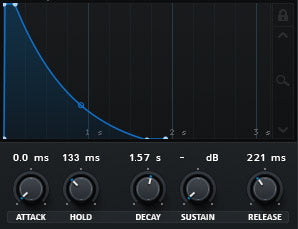
9) Now for the decay on ENV 1. Set this to around 1.5sec so that the tail decays nicely.
10) Now for the Filter. Send the Noise OSC and OSC A to a BN 12 Filter, turn up the cutoff to around one o'clock and add some drive.

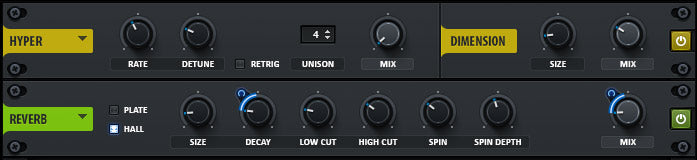
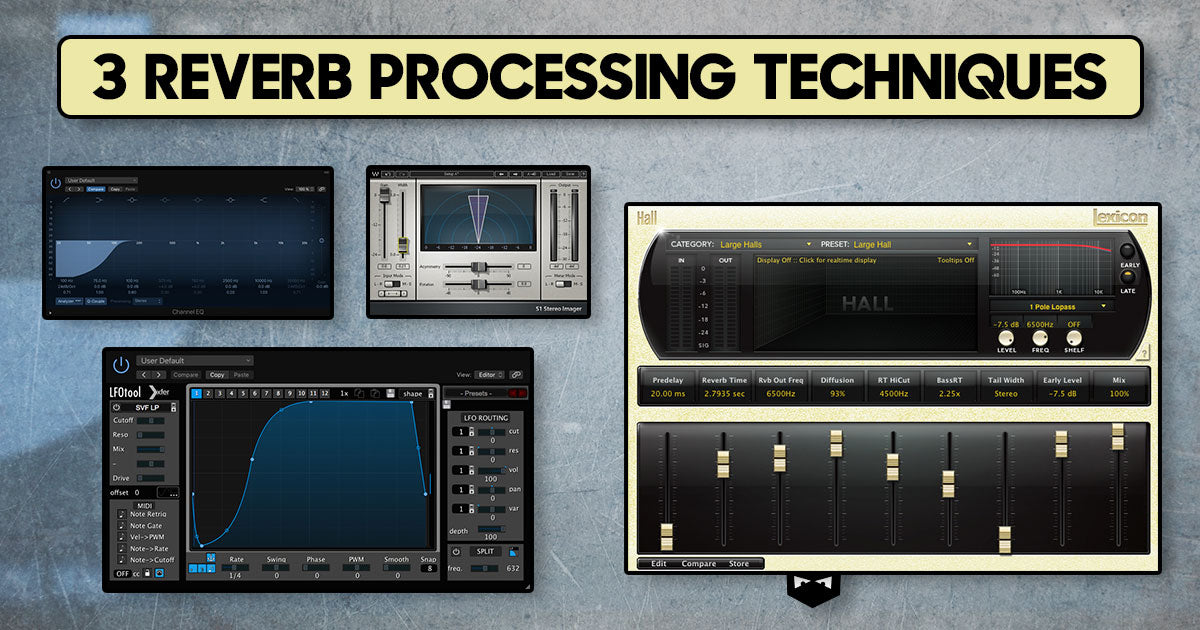
11) Ok, almost there now! Time for the final touches with some FX. Let's add a touch of Dimension and a Hall Reverb. Keep the dimension size fairly small and pull back the decay and the size of the hall.
12) Now for the icing on the cake, we'll assign some parameters to the macros that will help us shape the clap with a turn of a dial. Assign Macro one to the Dimension FX Mix, Reverb Decay and Reverb Mix. This will add a nice big space to you claps.
13) Here's another good assignment for one of the Macros. Set Macro 2 to the LFO 1 rate. This will allow you to dial in the speed/tone of the flam. Be careful, only apply a small amount of range to the rate as it can easily get out of hand!
That's it! If you thought that was helpful, wait till you see all of the other advanced techniques we uncover inside the full release of Chaos.
Below is a step-by-step video tutorial on how to create a pre-shifted clap inside Xfer Serum.
Have you ever wanted to create clap's purely from synthesis?
Sure, we know it's not the first thing that comes to mind when talking about synthesis, but there are many advantages in doing this.
For example, when creating a clap inside a synthesiser you have total control over how it sounds. Giving you the ability to shape the tone, length, attack and even the amount of flam.
Here's a step-by-Step guide on how to create the pre-shifted clap inside Xfer Serum:
(We've also included a video at the bottom of the post)
1) Initialise the preset.
2) Next, find a wavetable that has a nice amount of harmonics. In this example, we use "AT Cable" which is from our Xfer Serum Preset pack Chaos.
3) Switch on the noise OSC, set the pitch to around 12% and select your favourite noise. We chose "BrightWhite" for this example.
4) Switch on OSC B, select a sine wave and turn the volume all the way down. The reason we turn the volume all the way down is because we're going to use the sine wave on OSC B to modulate OSC A. We chose "Analog_BD_Sin" for this example.
The reason we chose a sine wave for the modulator is because a sine only outputs the fundamental frequency and no additional harmonics, as things can quickly become very noisy when using more complex waveforms.
5) On OSC A select "FM from B" and turn the amount to around one o'clock.
6) Next is the fun part! We're going to draw in the pre-shift for the clap. Go to LFO 1 and turn the grid size up to 16, this makes it easier for us to snap the marker points to the grid. Draw an LFO shape just like the one below. Holding ALT on your keyboard will snap the markers to the grid.
7) Now we assign LFO 1 to the following parameters. OSC A Volume, FM from B Amount, Noise OSC Volume. This is what gives us the illusion of multiple claps layered and shifted from one another.
8) Next, we're going to make some adjustments to the LFO settings. Turn off BPM sync and turn down the rate to around 1.9Hz. Then set the mode to ENV as we want the LFO to reset after each hit.
9) Now for the decay on ENV 1. Set this to around 1.5sec so that the tail decays nicely.
10) Now for the Filter. Send the Noise OSC and OSC A to a BN 12 Filter, turn up the cutoff to around one o'clock and add some drive.
11) Ok, almost there now! Time for the final touches with some FX. Let's add a touch of Dimension and a Hall Reverb. Keep the dimension size fairly small and pull back the decay and the size of the hall.
12) Now for the icing on the cake, we'll assign some parameters to the macros that will help us shape the clap with a turn of a dial. Assign Macro one to the Dimension FX Mix, Reverb Decay and Reverb Mix. This will add a nice big space to you claps.
13) Here's another good assignment for one of the Macros. Set Macro 2 to the LFO 1 rate. This will allow you to dial in the speed/tone of the flam. Be careful, only apply a small amount of range to the rate as it can easily get out of hand!
That's it! If you thought that was helpful, wait till you see all of the other advanced techniques we uncover inside the full release of Chaos.
Below is a step-by-step video tutorial on how to create a pre-shifted clap inside Xfer Serum.
Leave a comment
This site is protected by hCaptcha and the hCaptcha Privacy Policy and Terms of Service apply.