Introduce rhythmical movement to your pads and retain the energy flowing within your track.
Pads are great building blocks for intensifying the emotions of your composition. The vast majority of pads feature a slow attack and long release amplitude which represents a traditional bowed string instrument.
This amplitude setting is ideal for creating drama in cinematic music. However, when working on fast paced club tracks, pads can can slow the music down too much. To combat this we can introduce rhythmic movement giving the sound a sense of urgency.
There are a number of ways we can achieve movement within synthesis. Some of the prime components for modulation sources are envelopes, LFOs, sample & hold and sequencers. During this step-by-step guide we will focus on the LFO. Ramp LFO to be precise as it tends accentuate the transient portion of the LFO cycle.
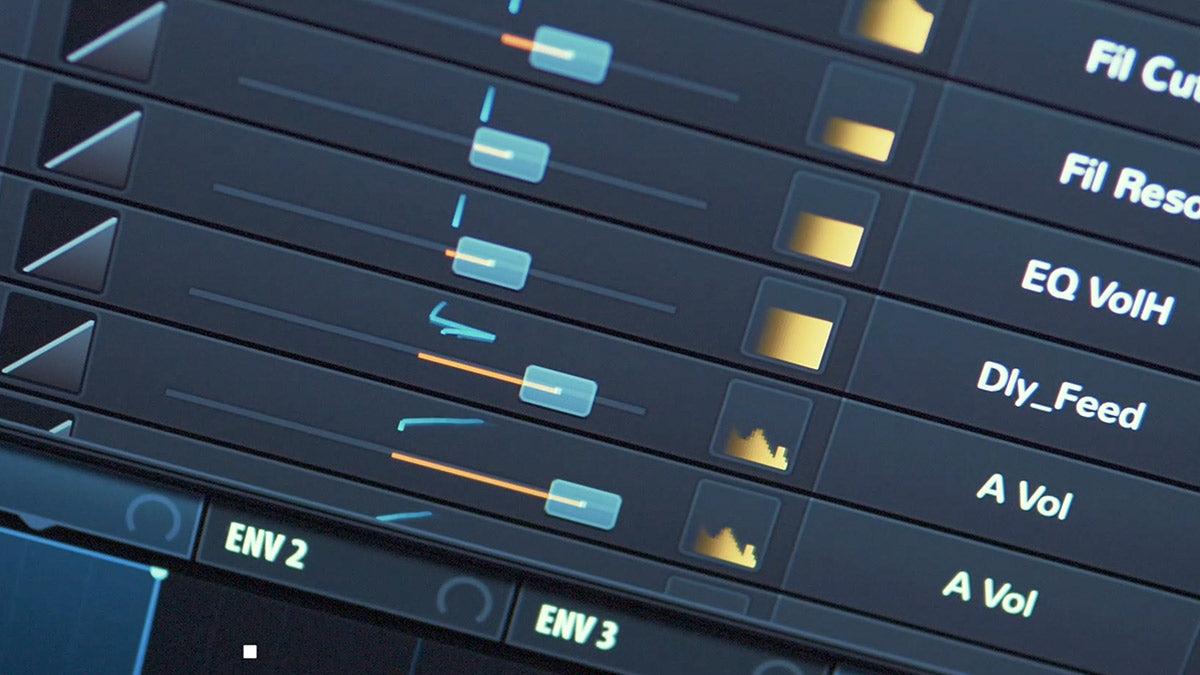
The ramp LFO can then be assigned to a variety of destinations depending on the sound you are trying to achieve. In our case we assigned the LFO to the filter cutoff, as well as the OSC A pitch fine tune. Sharing the same modulation source across multiple destinations can give a sense of unity to your patch.
After reading the guide don’t be afraid to further develop the patch. Try using sample & hold as a more unpredictable modulation source to your filter cutoff. Another destination to experiment with would be the LFO to the main VCA amount. Also, LFO to pan control to intensify the stereo field.
Step 1.
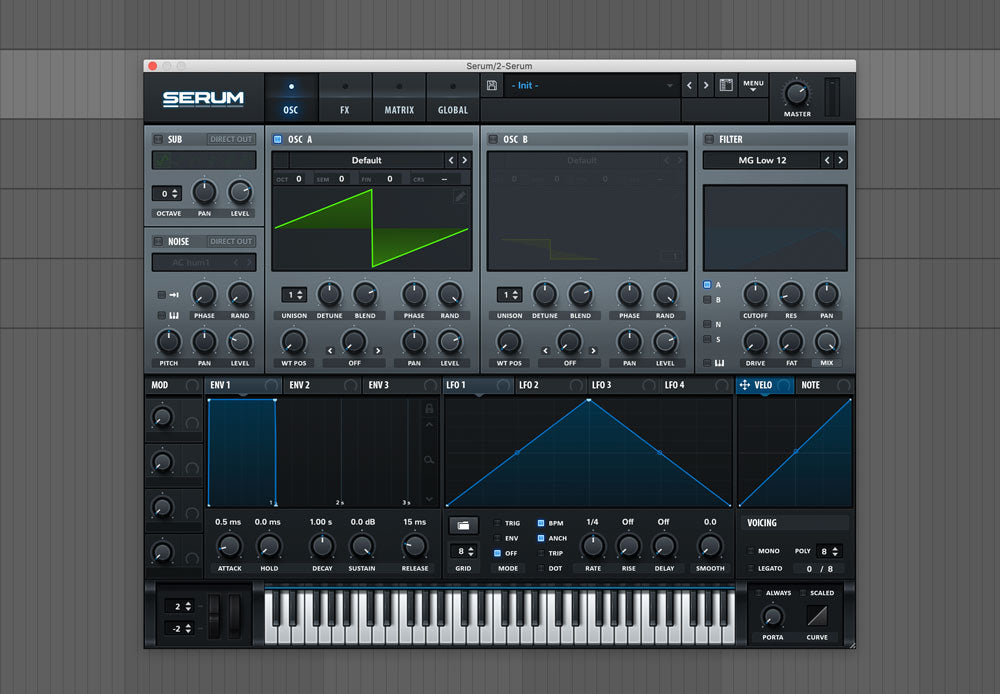
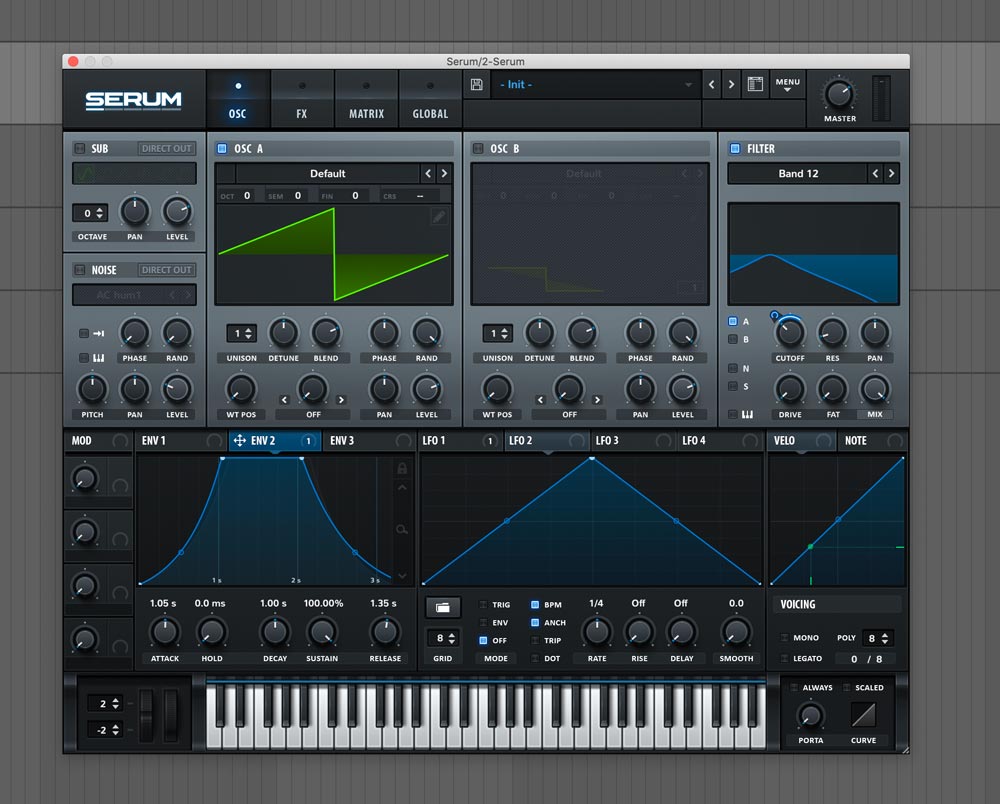
The first step is to load Xfer Serum into your DAW. Then click ‘Menu’ and ‘Init Preset’. This will initialise all of Serum’s parameters to its default state. If you play the keys on your MIDI keyboard you should only be hearing a raw unaffected sawtooth patch.
Step 2.
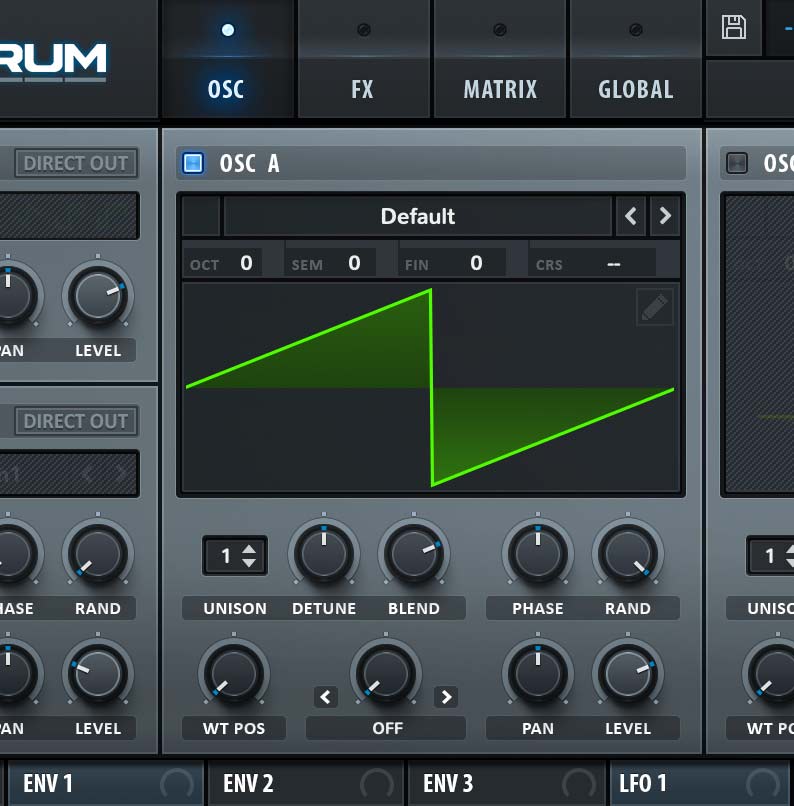
Next, choose a simple sawtooth waveform for OSC A. We find saws are a good starting point for warm and rich sounding pads. This will also allow you to recreate the patch within most subtractive synthesizers.
Step 3.
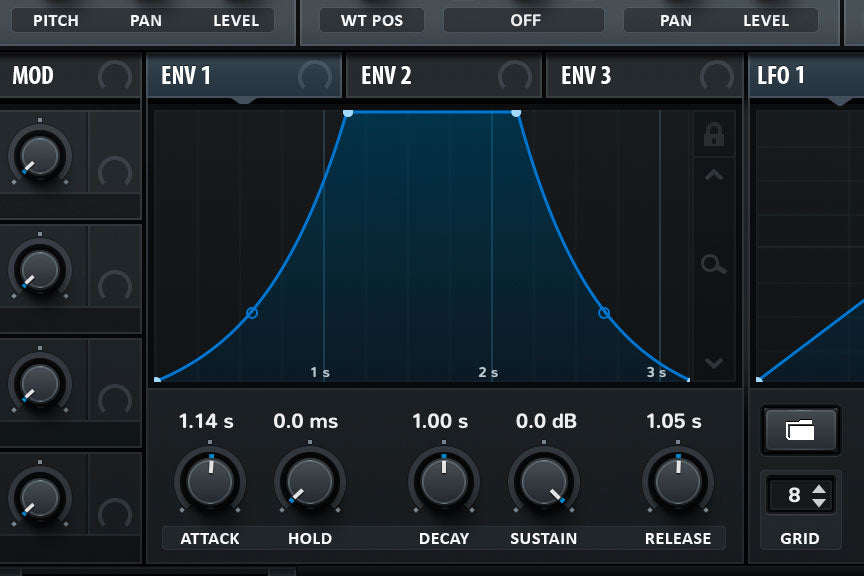
Pads tend to start slow and decay for a medium to long time. This is to create a smooth transition between chords. To achieve this we will use the envelope of the main amp. In Xfer Serum it is wired to ENV 1 by default.
Step 4.
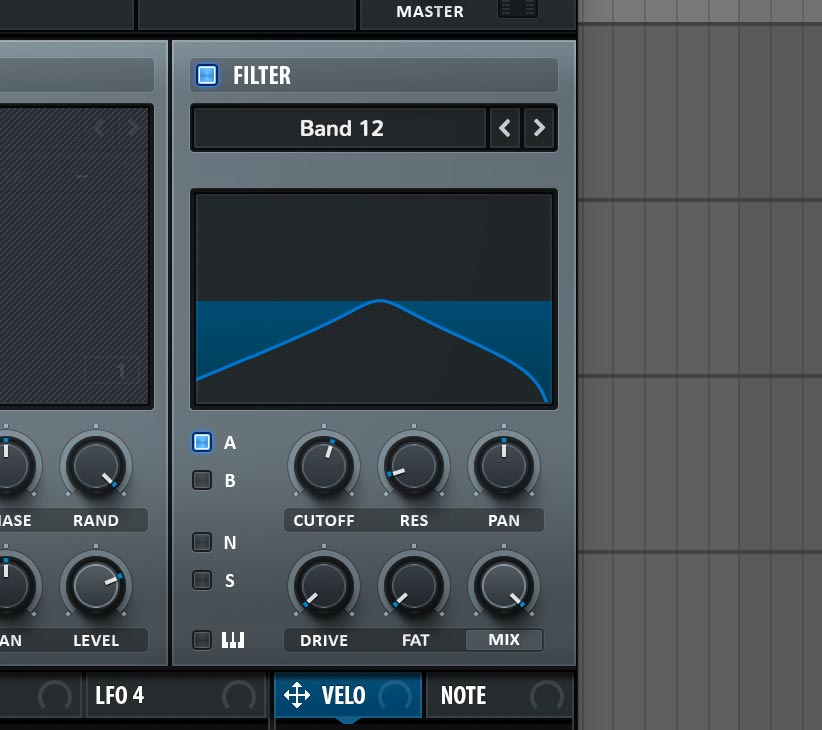
There are many choices of filter when it comes to pad sounds. If you don’t want your pad to take up so much bandwidth in the low-mid frequencies you can try a bandpass filter. This will also be the destination for our rhythmical movement.
Step 5.
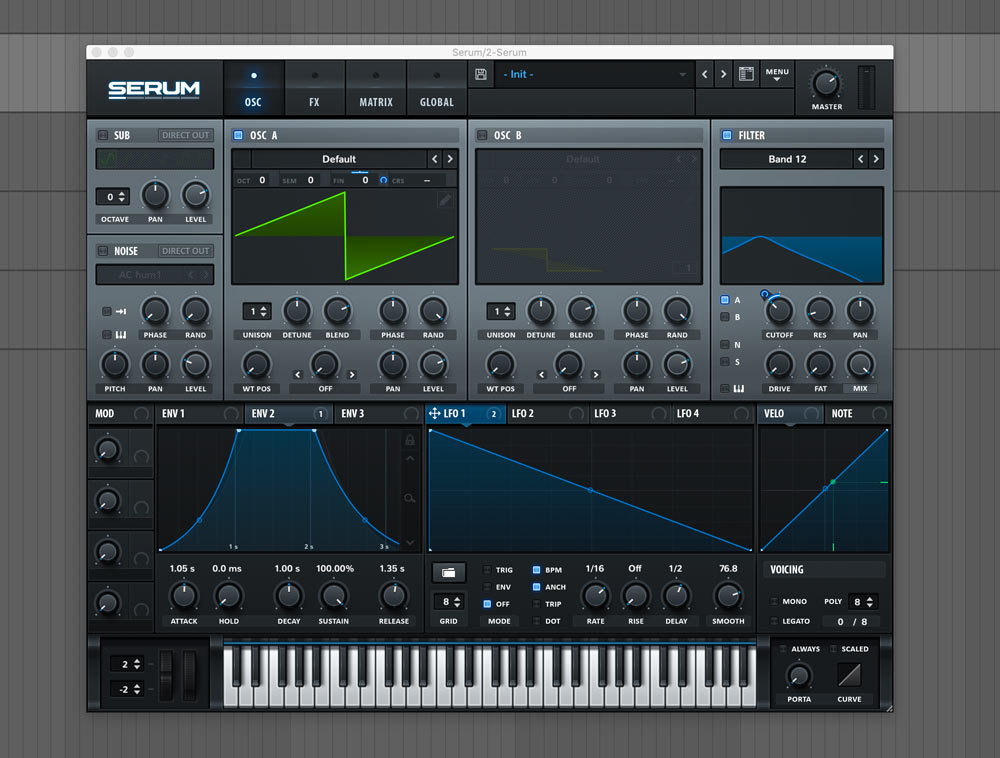
A smooth filter sweep is introduced via ENV 2. This adds a gentle opening of the cutoff once a key is played. Make sure you apply a fairly long release time so that the cutoff position movement is not abrupt when letting go of a key.
Step 6.
An obvious choice to create movement is to assign an LFO to filter cutoff. We choose to affect only a limited range, around 5% of cutoff modulation. Resulting in a subtle, yet noticeable fluctuation of the filter.

Step 7.
The LFO is synced to the BPM of the project. Choosing a 1/16 rate creates a nice rhythmical background. We adjust the shape of the LFO to be a downward ramp. This is very convenient to allow the transients to sync up with the grid.

Step 8.
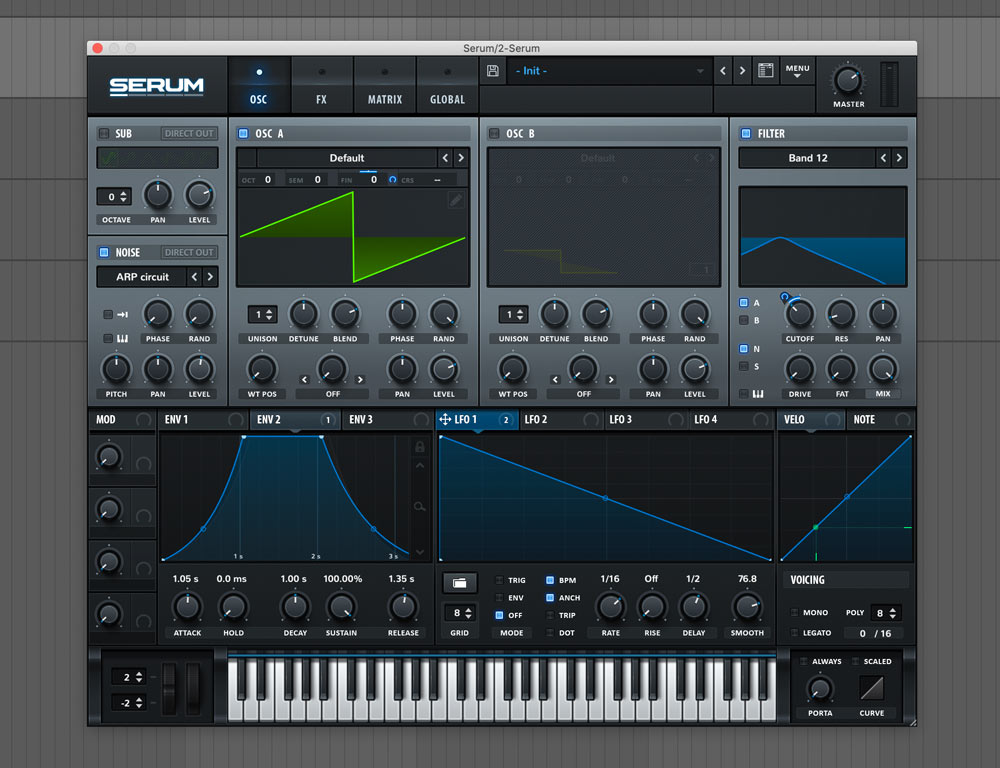
Since this is a smooth pad sound, the modulation from the LFO could be introduced gradually. In Xfer Serum we can simply increase the delay parameter of LFO1. This as the name implies, delays the modulation of the LFO to filter. We don’t want the delay to be abrupt. Dialling in the smooth amount will lead you to a gradual introduction of the LFO.

Step 9.
To further develop the patch we can add some subtle vibrato affect using the same ramp LFO source. Drag LFO 1 to OSC A Fine and start reducing the amount until the drift in pitch is less noticeable.
Step 10.
The final part before we move into the FX is adding a touch of noise. This will accentuate the filter even more and create a brighter overall sound. It’s an effective way to build tension in the transitional sections of your track.
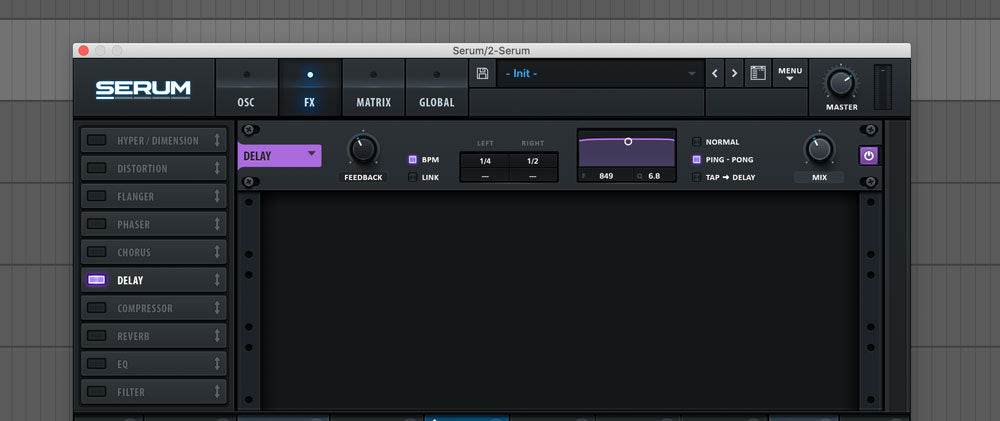
Step 11.
Our sound is very close to completion but there is still room to spice things up with FX. A ping- pong delay is a good option to add some width. Choosing slower delay times is an effective choice for pads.
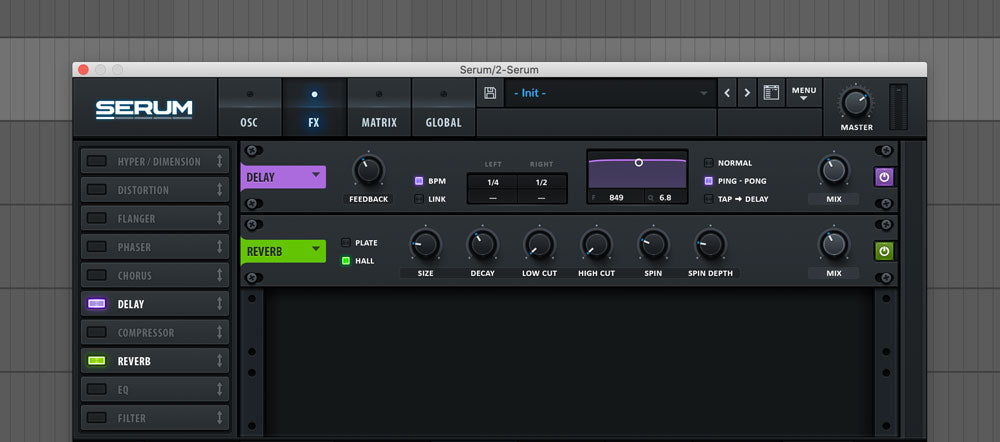
Step 12.
Lastly to add a sense of depth and cohesiveness a hall reverb is applied. A fairly long 5 second decay time and generous amount of wet signal puts the sound in a nice space. The result is a lush sounding pad with a synced rhythmical movement.
We trust you enjoyed following on this step-by-step tutorial. Now its your turn to implement these techniques into your own productions.
This article was written by Neil & Ed (Audiotent) and can also be seen in Computer Music Magazine.
Leave a comment
This site is protected by reCAPTCHA and the Google Privacy Policy and Terms of Service apply.